Sap Flow Gauge Build Steps

After you have your PCBs and parts, you'll need to assemble your gauges using the following steps:
- Apply solder paste on each of the exposed PCB pads.
- Place each component on the PCB in their corresponding spots (i.e., on top of the solder-paste-topped pads).
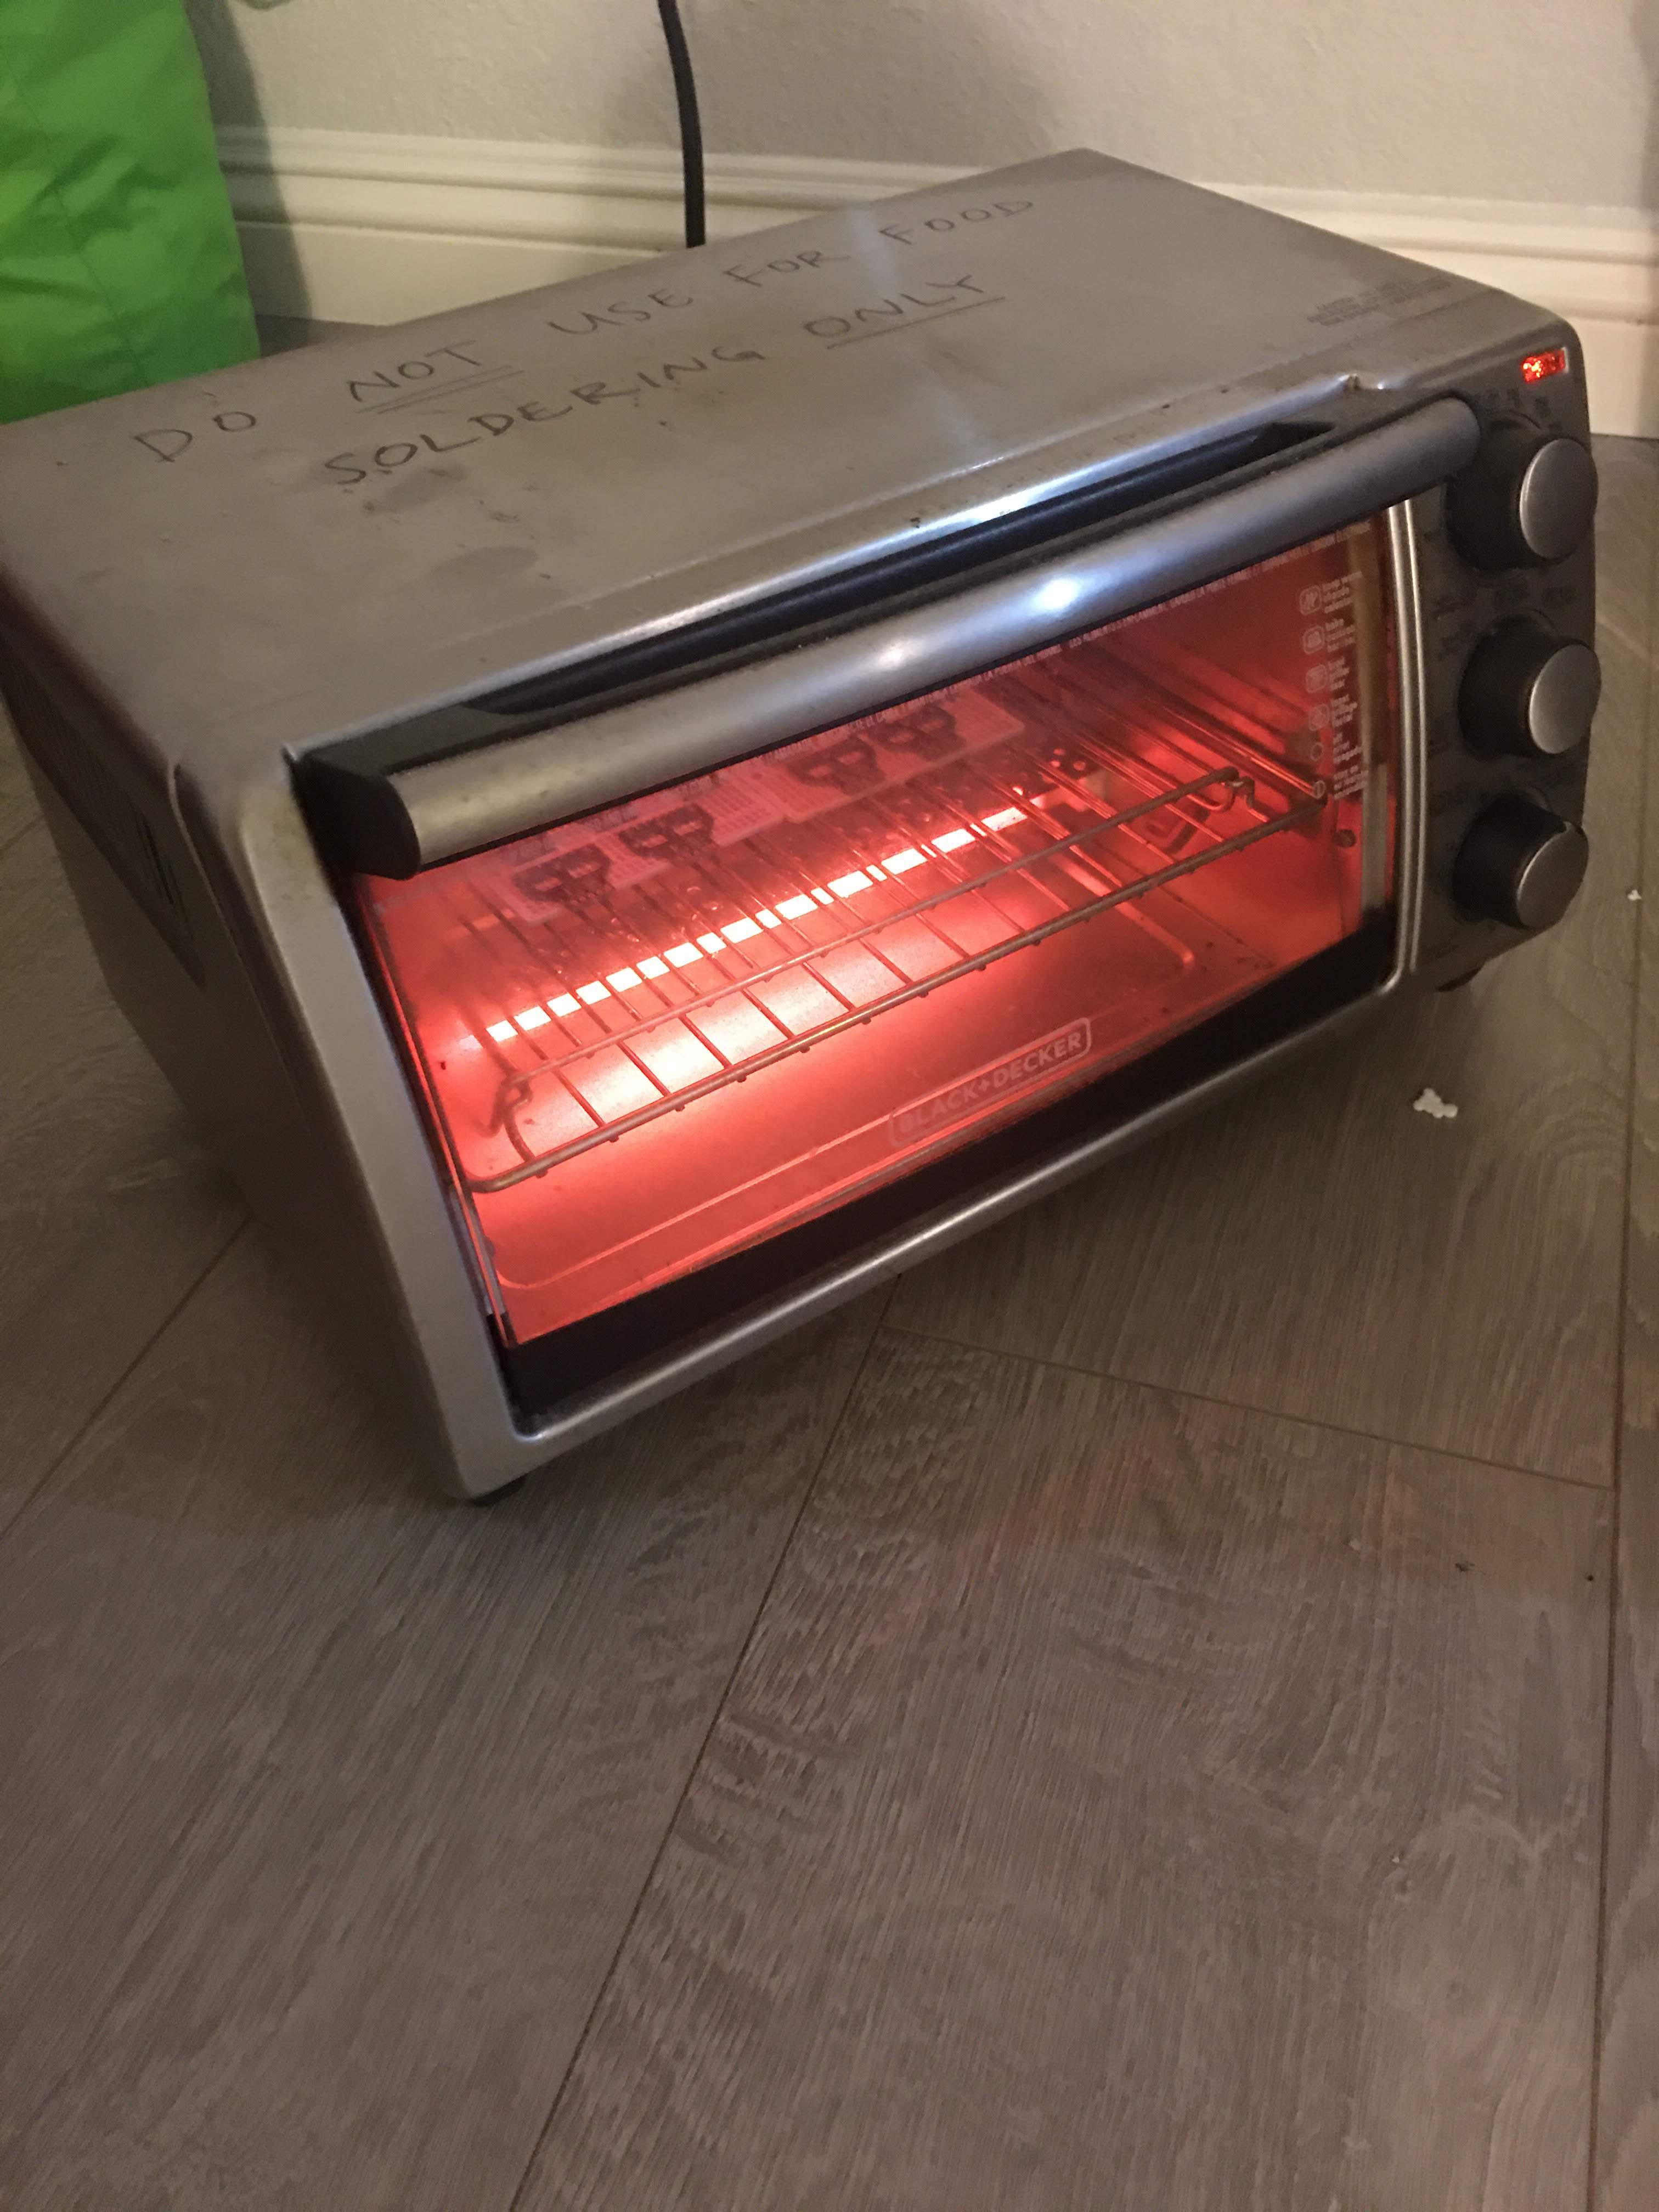
- Bake the PCB with components in a toaster oven (which you'll never use for food, as the fumes are hazardous).
- Manually re-solder defects.
Apply Solder Paste
Using either a syringe or stencil, apply solder paste to the exposed pads of your gauges:

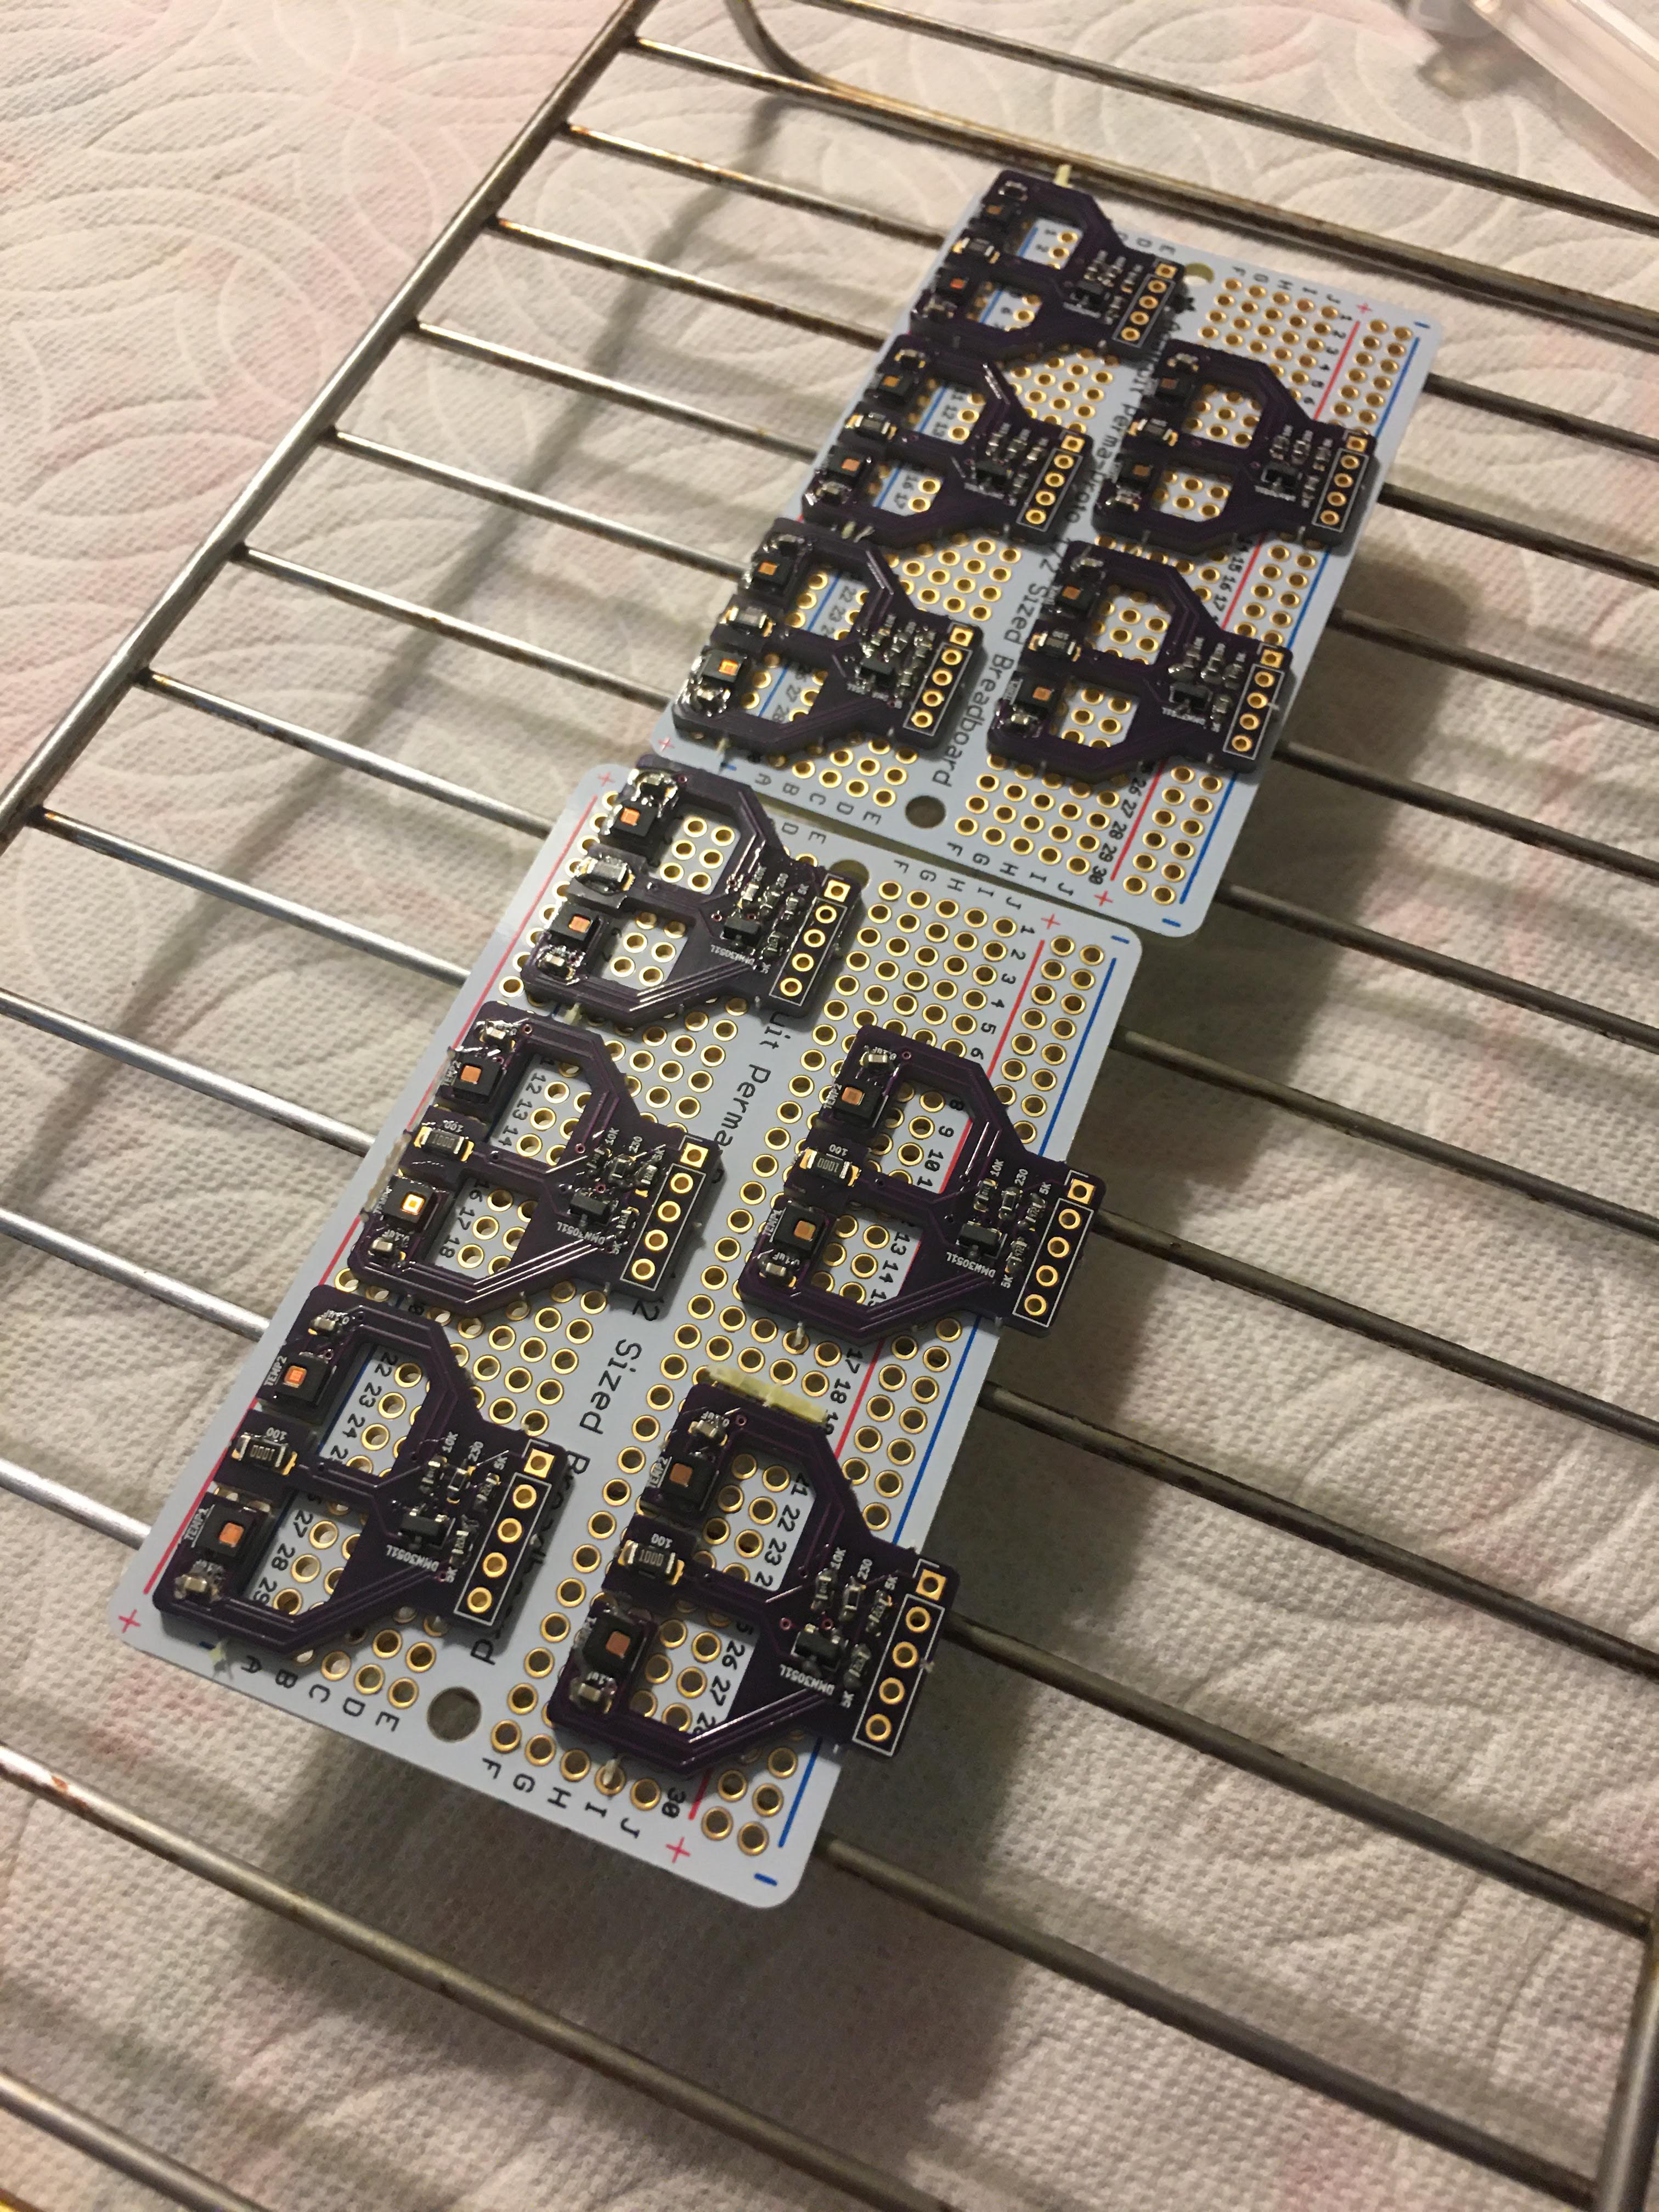
Place Components
Using tweezers, place each component onto its pads:
Bake the PCB with Components
Insert the PCBs with components into a toaster oven (which you'll never use for food because again, these fumes are toxic) set to 450 degrees F (or 230 degrees C):
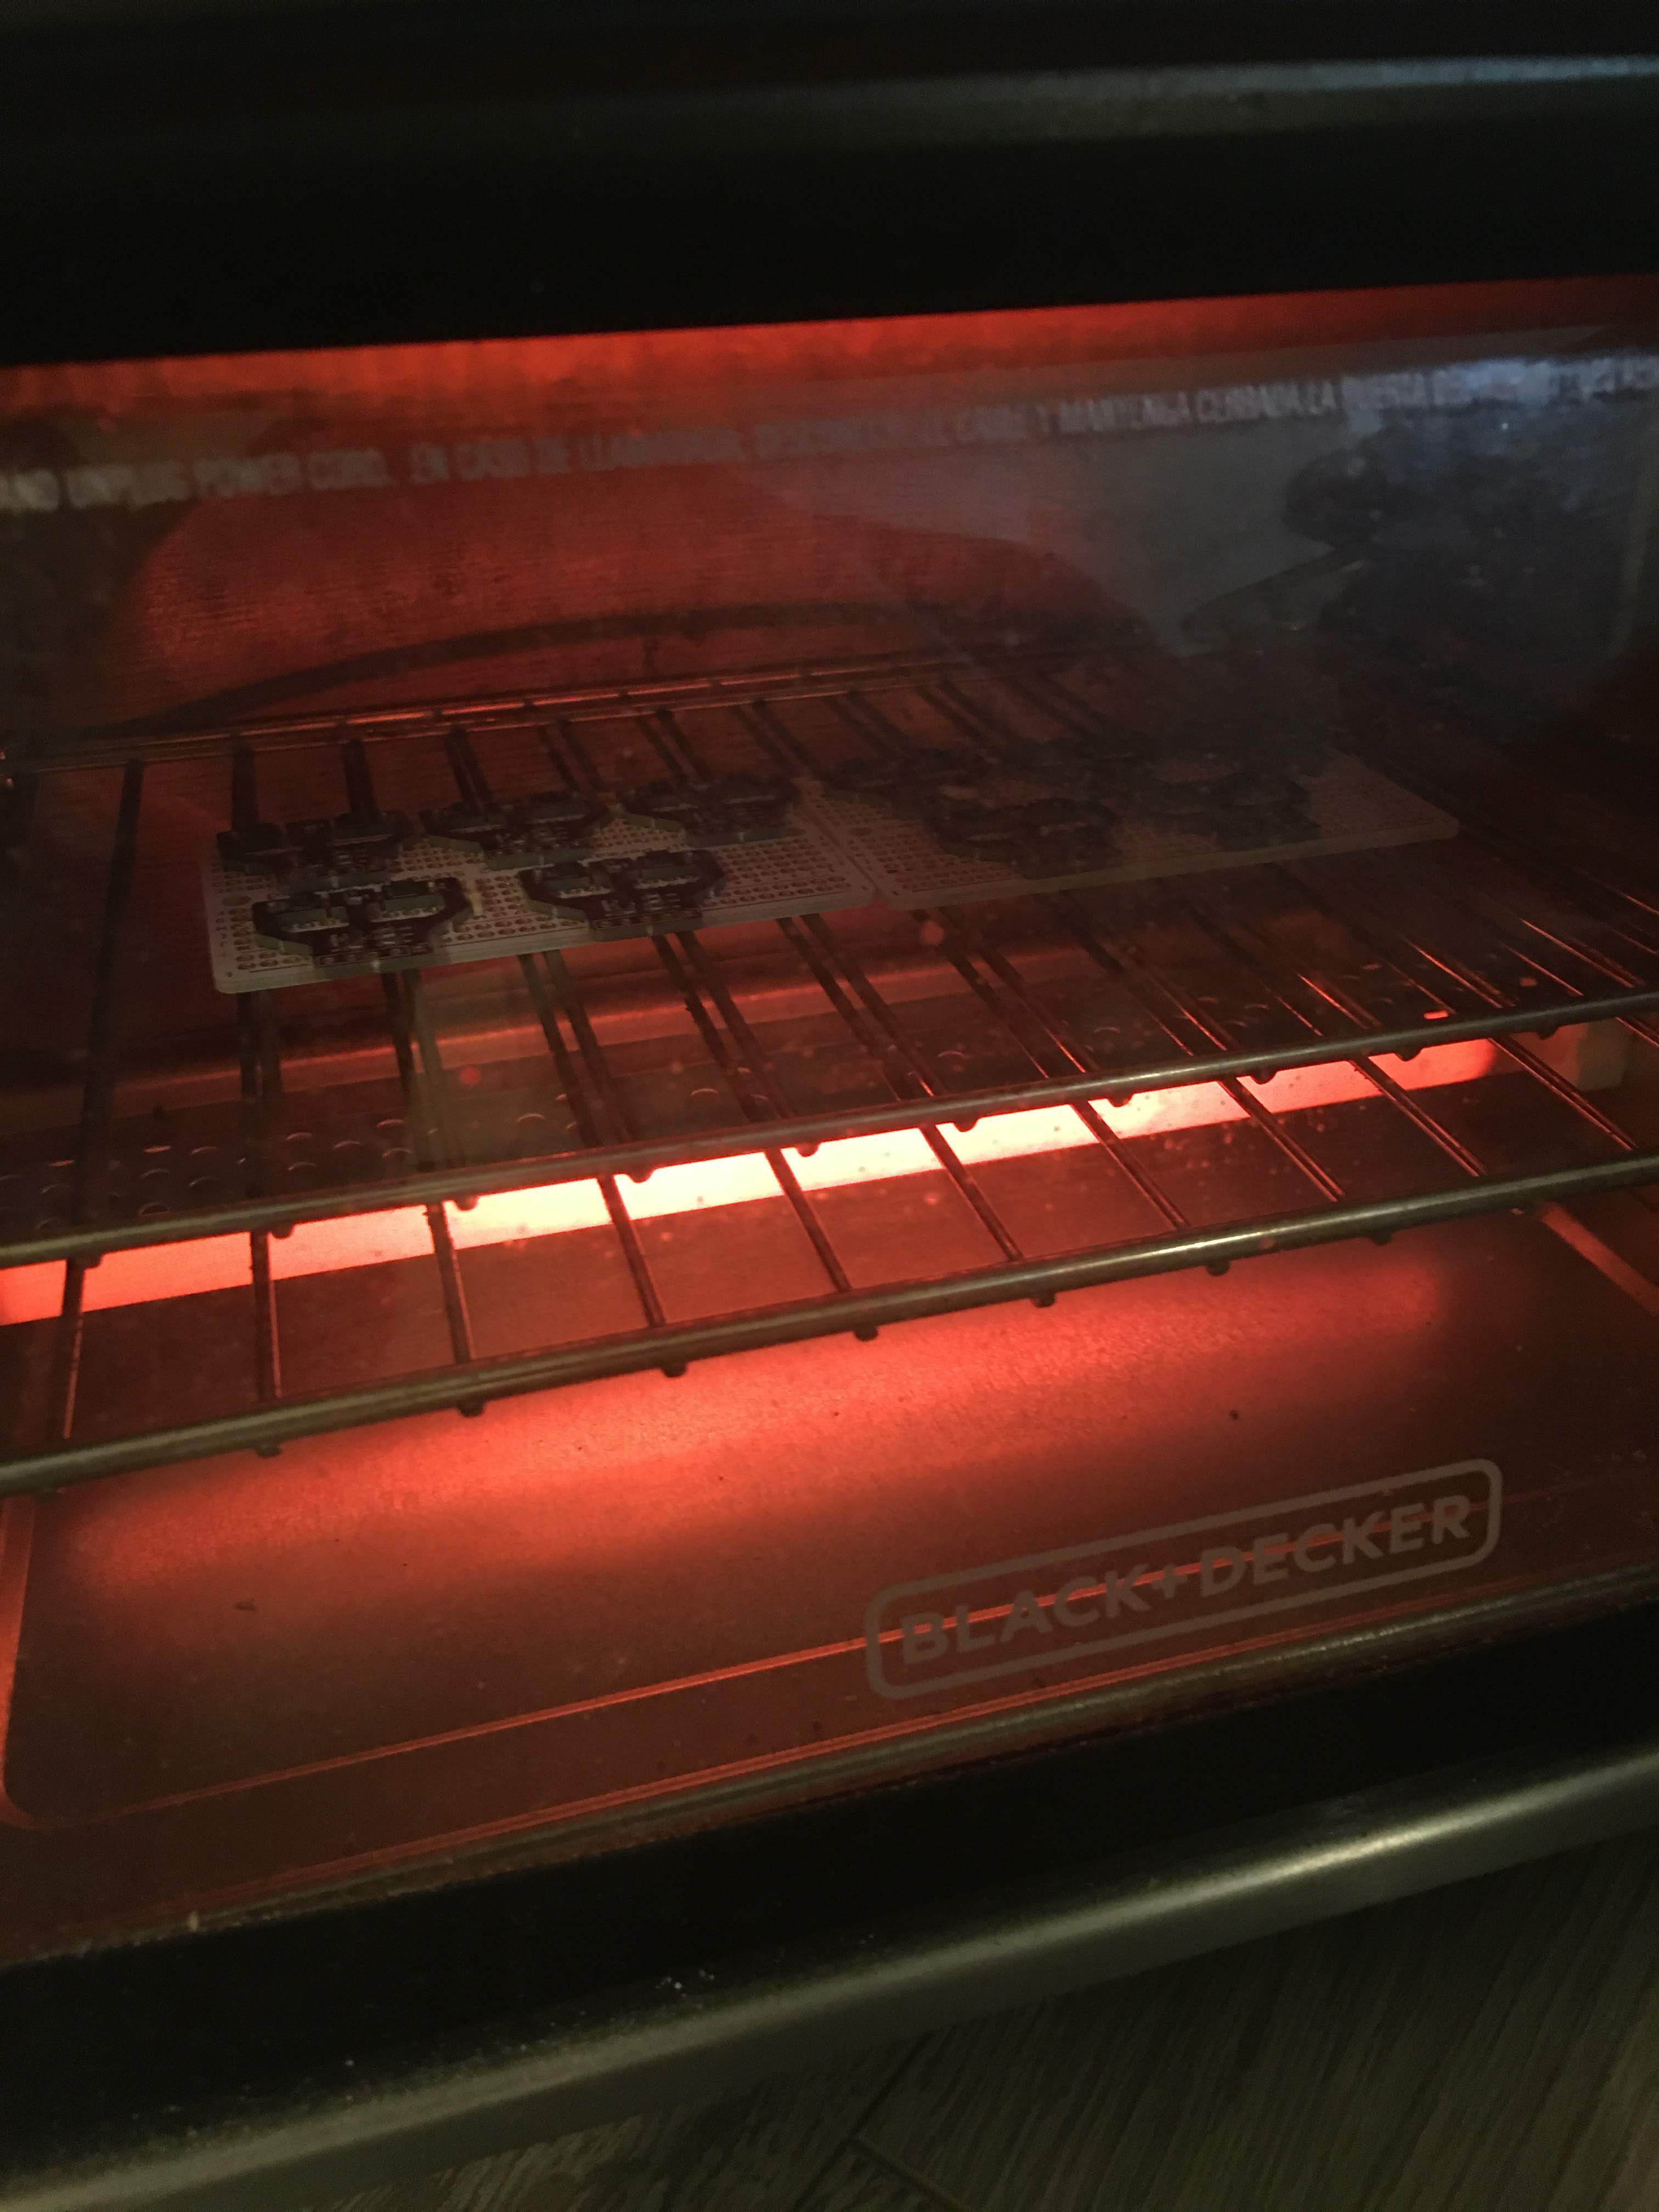
Keep the PCBs in the oven for ~10 minutes:
Manually Re-solder Defects
In all likelihood, there will be some defects in the solder reflow process:
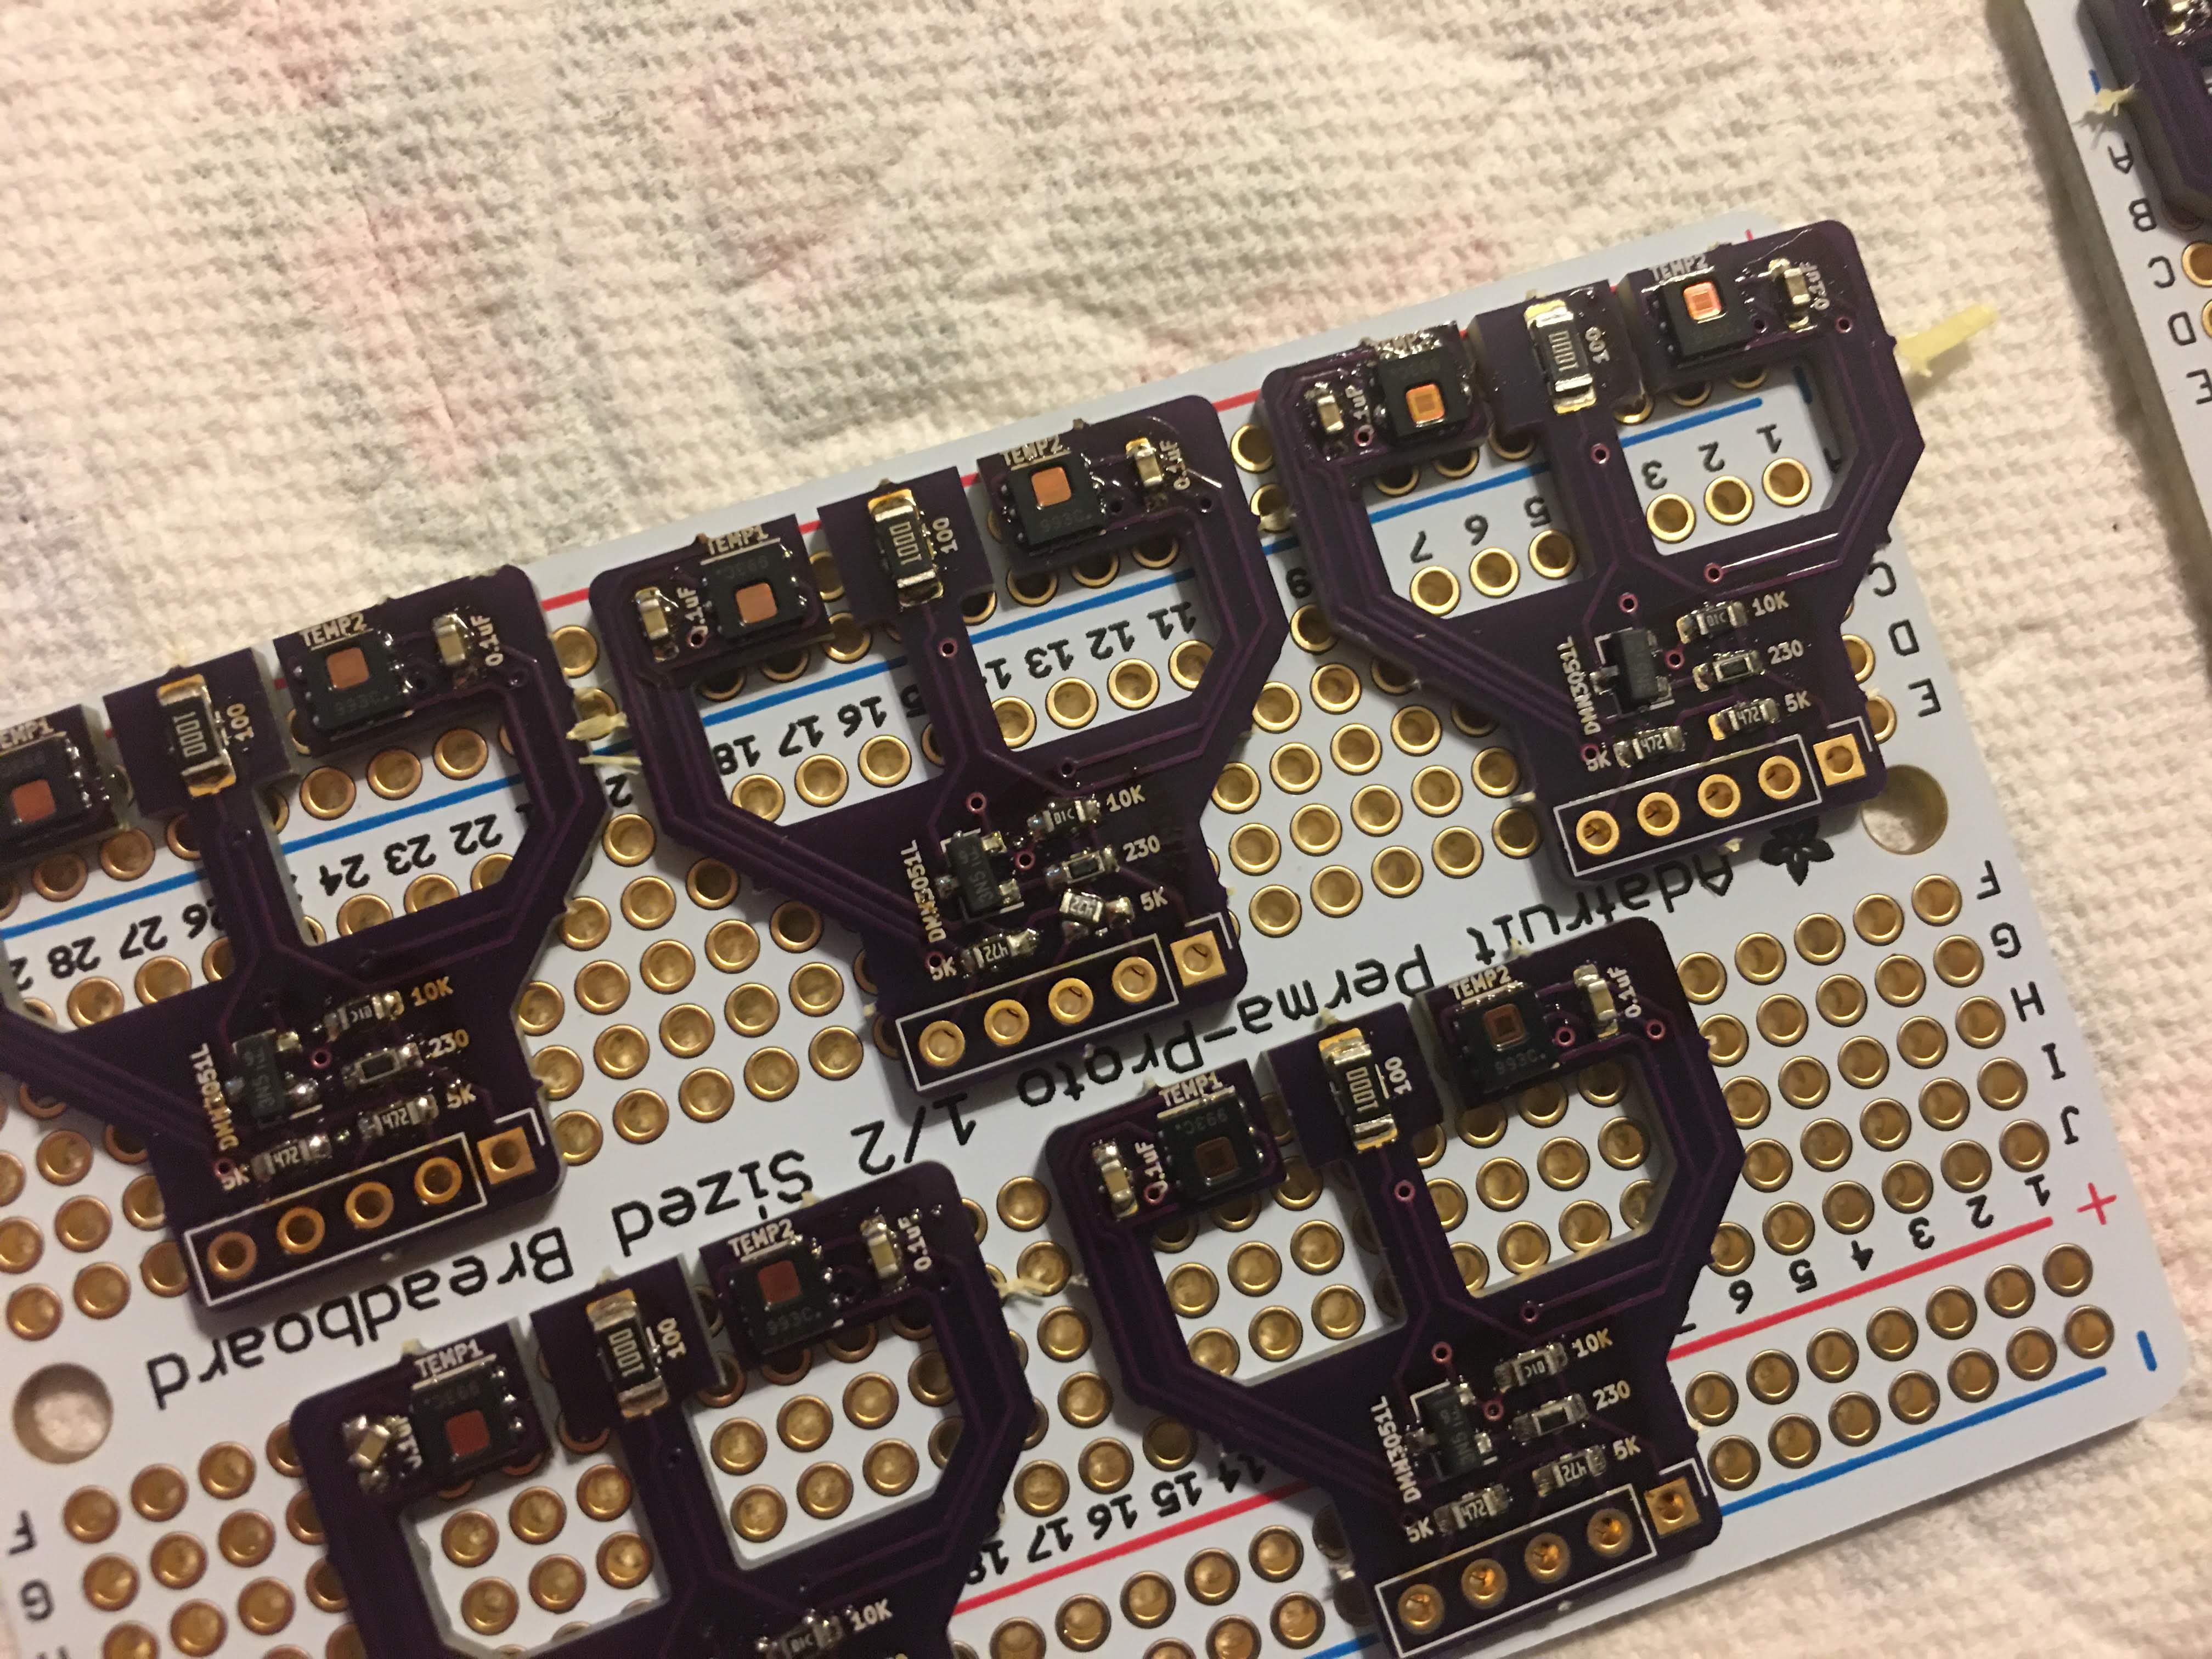
Often, you'll see solder bridges (e.g., multiple pins of the HDC2080 incorrectly soldered together) and tombstoning (e.g., resistors and capacitors rotating due to solder only reflowing onto one side of the component):

In these cases, you'll need to apply flux and manually re-solder the defects.
Educational Resources
- Applying solder paste to a PCB: EEVBlog #558.
- Using a toaster oven to perform solder reflow: EEVBlog #562.
Kevin Xu
Engineer @ Dotmote Labs